

Drip Irrigation with Weed Mat: Above or Below the Mat?
Weed mat and drip irrigation are a perfect match: drip puts water at the roots, and the mat stops weeds from stealing it. But growers setting up beds always ask the same question: should the drip line go under weed mat or on top of it? The answer affects how long your drip lasts, how much water you save and how easy repairs are. This guide compares both layouts, explains when each makes sense, and gives a step-by-step method for the setup most growers should use.
Quick answer: For most beds, lay the drip line under the weed mat: fix the laterals with 16 mm stakes, test them, then roll the mat over and cut holes at each dripper. The pipe is shaded from the sun, water goes straight to the roots and the bed stays neat. Put drip on top only where you need to inspect or move lines often.
Who this guide is for: vegetable and strawberry growers, polyhouse and nursery operators, orchard owners and terrace gardeners combining drip irrigation with weed mat on beds and rows.
Key facts at a glance:
- Weed mat: 110 GSM woven, UV stabilised, water and air permeable; 0.6 m, 1 m and 1.5 m wide, in 5 m to 100 m rolls
- 16 mm blue drip pipe stakes: packs of 100 to 1000
- Galvanized U-pins (straddle 16 mm pipe and pin mat): packs of 100 to 1000
- 6 inch weed mat nails: packs of 100 to 1000
- Stake spacing: every 1 to 2 m, plus one at each bend and end
Drip under weed mat vs on top: comparison
| Factor | Drip under the mat | Drip on top of the mat |
|---|---|---|
| Sun exposure on pipe | Shaded by the mat | Full sun all season |
| Water delivery | Straight into the soil at the root zone | Drips onto the mat and soaks through the weave |
| Evaporation | Lower, soil stays covered | Some loss from the wet mat surface |
| Pipe movement | Held by stakes and the mat | Free to snake in the heat unless staked |
| Inspection and repair | Need to lift a flap or the mat edge | Easy to see and fix |
| Look | Neat, pipe hidden | Pipe visible on the bed |
| Best for | Permanent and seasonal beds, strawberry, orchards, polyhouses | Trial plots, beds where lines move often |
Because our woven mat lets water and air through, drip on top still works. But for most growers, drip under the mat gives better water use, longer pipe life and less work once set up.
What you need
- 1 m weed mat for beds up to about 80 cm wide, or 1.5 m weed mat for wider beds and orchard rows.
- 16 mm drip laterals with drippers at plant spacing, a filter and end caps.
- 16 mm drip pipe holder stakes to fix laterals before covering.
- Galvanized U-pins to pin the mat over the pipe at ends and joins.
- 6 inch weed mat nails (or 7 inch for sandy or windy sites) for the mat edges.
How to lay drip under weed mat, step by step
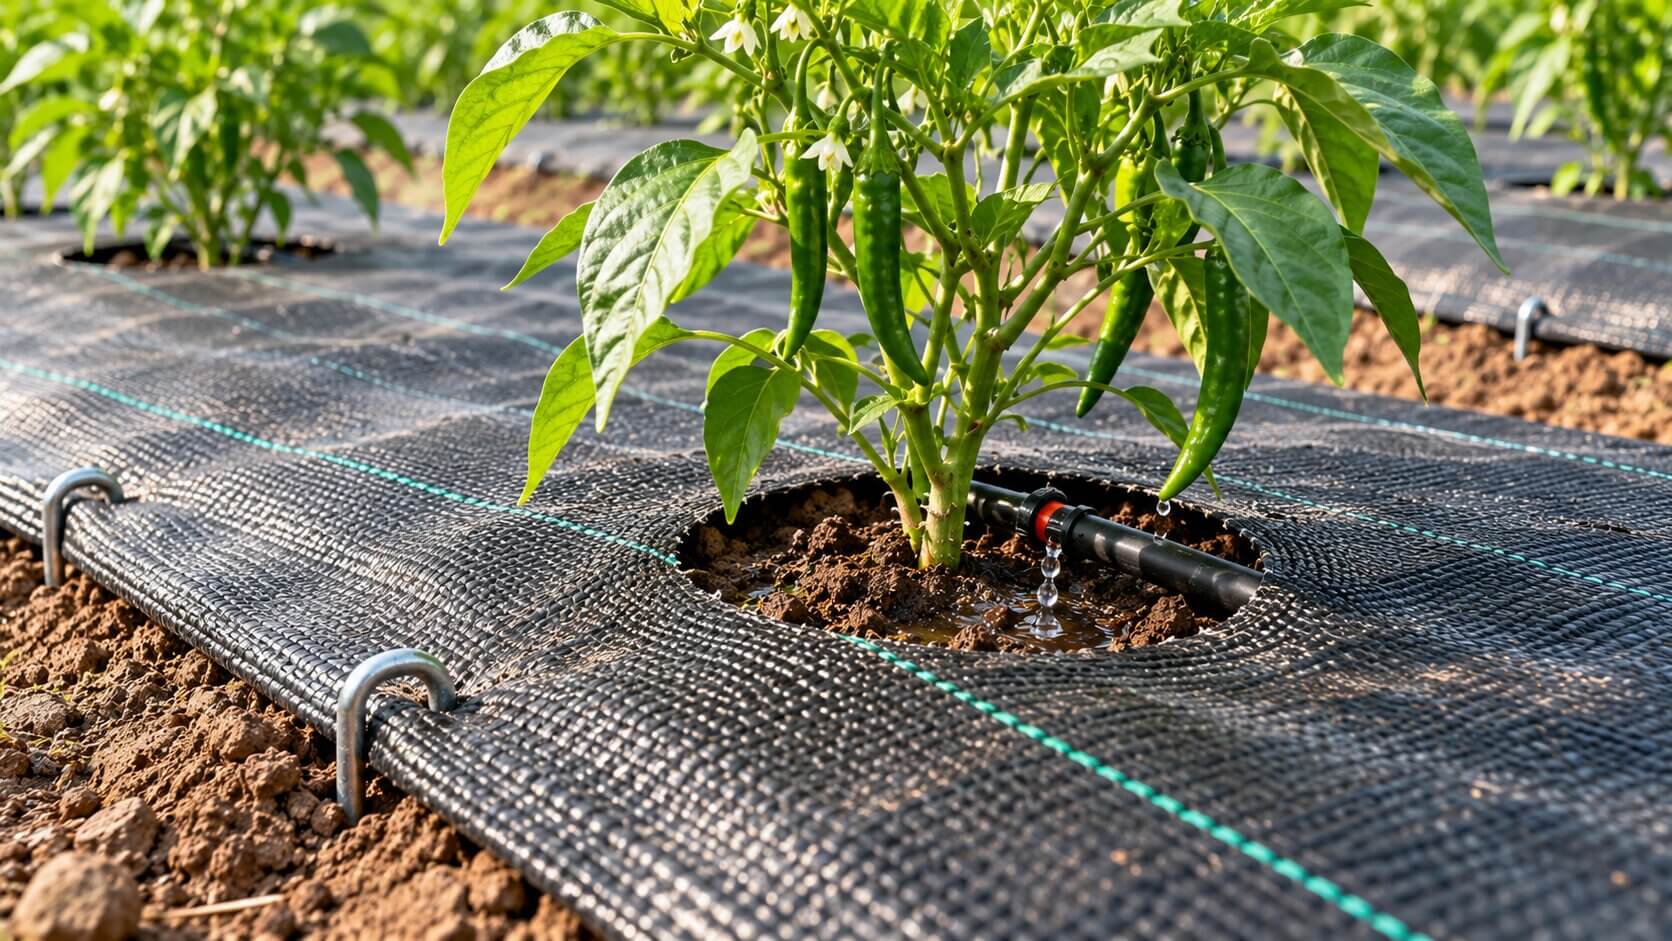
- Prepare the bed. Clear weeds and stones, add compost and level the surface.
- Lay the laterals along the bed with drippers where plants will go. Let the pipe warm in the sun so it straightens.
- Fix the laterals. Push a drip stake in every 1 to 2 m and at each bend, and press the pipe into the C-clip. This keeps drippers lined up with the planting holes you will cut.
- Test the system. Run water and check every dripper. Fixing a problem now is far easier than after the mat goes down.
- Mark dripper positions on the bed edge with small sticks, so you can find them through the mat.
- Roll the weed mat over the bed. Use the green guide lines to keep it straight.
- Pin the mat. Nails every 1 to 1.5 m along the edges; U-pins over the pipe at each bed end and along any joins, since they straddle 16 mm pipe without crushing it.
- Cut small X holes at each dripper and plant through them.
- Leave an inspection point at the start of each lateral, such as a short slit you can fold back, so you can check the connector and filter.
For more on laying mat and drip together, see our strawberry and vegetable bed guide and how to lay drip lines on raised beds.
When drip on top of the mat makes sense
- Trial beds where you are still deciding plant spacing.
- Rows where you move drip lines between crops every few weeks.
- Quick repairs, where you lay a temporary line over an existing mat.
If you run drip on top, still fix it with stakes or U-pins every 1 to 2 m so it does not snake away from the plants. Our guide on stopping drip pipes shifting explains why.
Worked example: 10 beds of 1 m × 30 m, one lateral each
| Item | Quantity | Pack choice |
|---|---|---|
| Weed mat 1 m × 100 m | 300 m of bed | 3 rolls |
| 16 mm drip stakes (1.5 m spacing + ends) | about 210 | 200 + 100 |
| 6 inch nails (both edges every 1 m) | about 600 | 500 + 100 |
| U-pins (bed ends, joins, inspection points) | about 60 | 100 |
Drip pipe, drippers and fittings are sourced separately. For farm-scale orders, ask us for a bulk quote.
Common mistakes
- Covering drip before testing: always run the system first.
- No stakes under the mat: laterals still move and drippers end up away from the holes.
- Nails through the pipe: never nail over the line; use U-pins that straddle it.
- Big planting holes: keep cuts small so light and weeds stay out.
- No filter: clogged drippers under a mat are harder to find.
Related guides
Compare fixings in weed mat nails vs U-pins, choose your width in which weed mat roll width to buy, and read keep drip lines in place with stakes and U-pins.
Sources and further reading
- Commercial Vegetable Production: Fertigation, MF-1092 (Kansas State University Extension): extension guide describing drip irrigation with plastic mulch as standard practice and fertigation through drip as more efficient
- Drip irrigation under plastic mulch for cotton in Xinjiang, China (WOCAT SLM database): documented practice showing water saving and weed suppression from drip under mulch
- MIDH Operational Guidelines, April 2025: Government of India horticulture mission guidelines covering plastic mulching and protected cultivation
Frequently asked questions
Should drip irrigation go under or over weed mat?
For most beds, under. Fix and test the drip lines, then roll the weed mat over them and cut holes at each dripper. The pipe is shaded and water goes straight to the roots.
Does water from drip pass through weed mat?
Yes. Woven weed mat is water permeable, so drip on top still soaks through, but drip under the mat delivers water more directly and loses less to evaporation.
How do I pin weed mat over a drip line?
Use galvanized U-pins, which straddle 16 mm pipe without crushing it. Never push nails through the line.
How do I find drippers under the mat?
Mark each dripper position at the bed edge before laying the mat, then cut small X holes in line with the marks.
How many drip stakes do I need under weed mat?
One every 1 to 2 m along each lateral plus one at each bend and end. A 30 m lateral at 1.5 m spacing needs about 21.
Can I repair drip under weed mat?
Yes. Fold back the mat at the planting hole or lift the edge near the problem, fix the pipe, then re-pin the mat.



LEAVE A COMMENT