

How to Lay Drip Lines on Raised Beds
Raised beds and drip irrigation are made for each other. The bed gives roots loose, well-drained soil, and drip puts water right where those roots are, with no runoff down the sides. But a badly laid line, with drippers in the wrong place or a pipe that wanders, wastes most of that advantage. This guide shows how to plan and lay drip irrigation on a raised bed, step by step, from choosing how many lines to fixing them so they stay put.
What you need
| Part | What it does |
|---|---|
| Main or sub-main pipe | Carries water from the tap or pump along the head of the beds |
| Filter | Stops dirt clogging the drippers |
| 16 mm lateral pipe with inline drippers | Runs along each bed and waters the plants |
| Start connectors (with grommets) | Join each lateral to the main |
| End caps or end folds | Close the far end of each lateral; open to flush |
| 16 mm drip pipe holder stakes | Hold laterals in place so drippers stay at the plants |
| Optional: weed mat and nails | Covers the bed to stop weeds and hold moisture |
Step 1: Plan how many laterals per bed
The number of lines depends on bed width and how many plant rows you grow. As a general guide:
| Bed width | Plant rows | Laterals |
|---|---|---|
| Up to about 60 cm | 1 | 1, down the centre |
| 75 to 90 cm | 2 | 1 central line for shallow-rooted crops, or 2 lines |
| 90 to 120 cm | 2 to 3 | 2 lines, one under each outer plant row |
Choose dripper spacing to match your plant spacing, so each plant has a dripper beside it. For closely spaced crops like greens, drippers at close intervals create a continuous wet strip.
Step 2: Lay the main along the head of the beds
Run the main or sub-main across one end of the beds, with a filter near the water source. Punch a hole opposite the centre of each lateral position, fit a grommet and a start connector.
Step 3: Roll out and relax the laterals
Unroll each lateral along its bed and leave it in the sun for a while. Warm pipe loses its coil and lies flat, which makes it much easier to fix straight.
Step 4: Connect and close
Push each lateral onto its start connector. At the far end, fit an end cap or fold the pipe back and secure it, so you can open it later for flushing.
Step 5: Fix the laterals in place
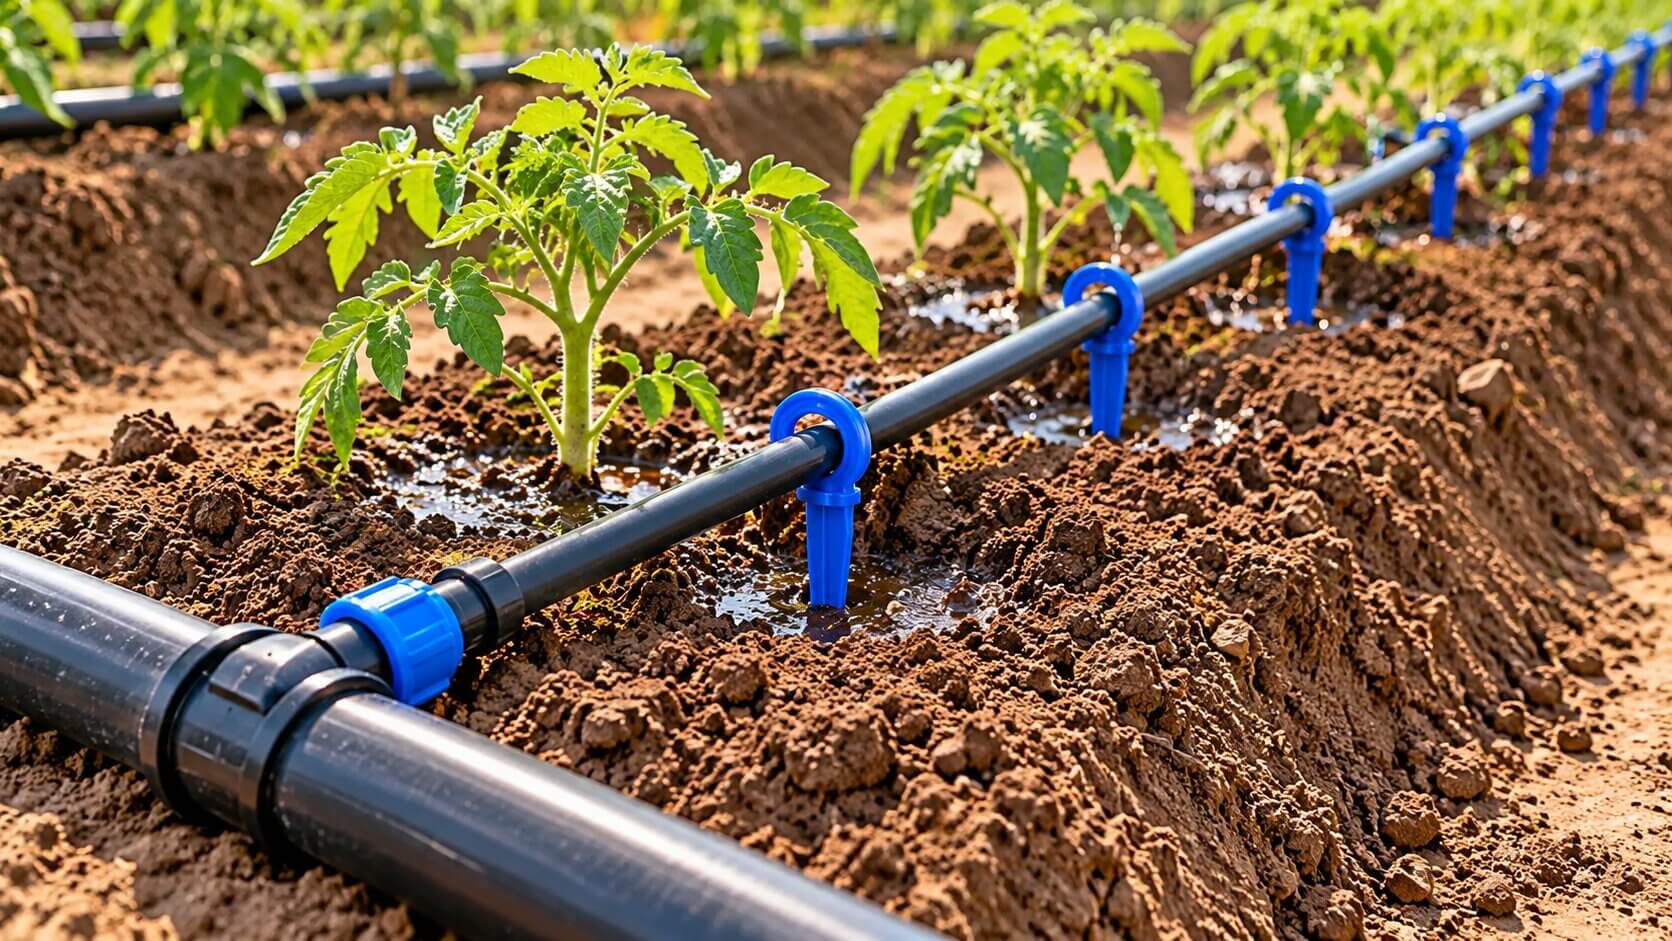
This is the step most people skip, and why drip lines snake away from plants within a week. Push a drip pipe holder stake into the bed beside the line and press the pipe into its C-clip:
- One stake near the start and one near the end of each lateral.
- One every 1 to 2 m along the bed.
- One at every bend or turn.
The stakes fit 16 mm outside-diameter pipe and are about 6 inch long. For more on why lines move and how to stop it, read stop drip pipes shifting.
Step 6: Flush and test
- Open the end caps and run water to flush out dirt from installation.
- Close the ends and run the system.
- Walk every bed. Check each dripper is wetting the right spot and the wet zone reaches each plant.
- Adjust the line and re-clip where needed.
Step 7 (optional): Cover with weed mat
Once the drip is tested, roll weed mat over the bed, pin the edges, and cut small holes at each dripper for planting. The mat stops weeds growing in the wet strip and cuts evaporation. A 1 m roll suits beds up to about 80 cm wide. Our strawberry and vegetable bed guide shows the full mat and drip setup, and the nails vs U-pins guide explains pinning.
How many stakes for your beds?
| Layout | Lateral length | Stakes (1.5 m spacing + ends) | Pack |
|---|---|---|---|
| 4 beds × 6 m, 1 lateral each | 24 m | about 24 | 100 |
| 8 beds × 10 m, 2 laterals each | 160 m | about 140 | 200 |
| 30 beds × 30 m, 2 laterals each | 1,800 m | about 1,320 | 1000 + 500 |
For a full farm, ask us for a bulk quote.
Watering tips
- Water early in the morning so plants start the day hydrated.
- Run time depends on dripper flow, soil, crop and weather. Start short, then check moisture a few centimetres down and adjust.
- Clean the filter regularly and flush laterals every few weeks.
- Walk the beds after weeding or harvesting and re-clip any line that has been moved.
Common mistakes
- No stakes: lines curl away from plants in the sun.
- Dripper spacing that does not match plant spacing: some plants miss out.
- Covering with mat before testing: you have to lift it all to fix problems.
- No filter: drippers clog within weeks.
Growing in grow bags on a terrace instead? See our terrace kitchen garden starter kit.
Shop 16 mm drip pipe holder stakes →
Frequently asked questions
How many drip lines do I need per raised bed?
One lateral down the centre for beds up to about 60 cm wide, and two laterals, one under each outer plant row, for beds 90 to 120 cm wide.
How do I stop drip lines moving on raised beds?
Fix each 16 mm lateral with drip pipe holder stakes near both ends, every 1 to 2 m along the bed and at every bend.
Should drip lines go under weed mat?
Lay, fix and test the drip lines first, then roll weed mat over the bed and cut holes at each dripper.
How far apart should drippers be?
Match dripper spacing to your plant spacing so each plant has a dripper beside it. Closely spaced crops can use close dripper spacing for a continuous wet strip.
How long should I run drip on raised beds?
It depends on dripper flow, soil type, crop and weather. Start with short runs, check soil moisture a few centimetres down and adjust.
Do I need a filter for drip irrigation?
Yes. A filter near the water source stops dirt from clogging the drippers.


LEAVE A COMMENT